NOTICE: You are in the old ClientSpace Help system. Please link to the new ClientSpace Help here https://extranet.clientspace.net/helpdoc/home/ClientSpace.htm
Creating activities, cases, and tasks from your Outlook email
This topic provides instructions for creating activities, cases, and tasks from your Outlook email.
After you have installed the email add-in for Outlook, you are ready to create activities, cases, and tasks. You want to target emails that are relevant and then post the emails to ClientSpace.
Posting an email to ClientSpace
Note: ClientSpace and Pulse are the same product. When you click Post To ClientSpace in Outlook, it takes you to the Post To Pulse page. While the names are different, you using the same product (ClientSpace = Pulse).
To post an email to ClientSpace:
- Open Outlook.
- Select and open an email.
- From the open email, on the right, click . . . (More actions), and select ClientSpace for Outlook.
The ClientSpace for Outlook pane opens.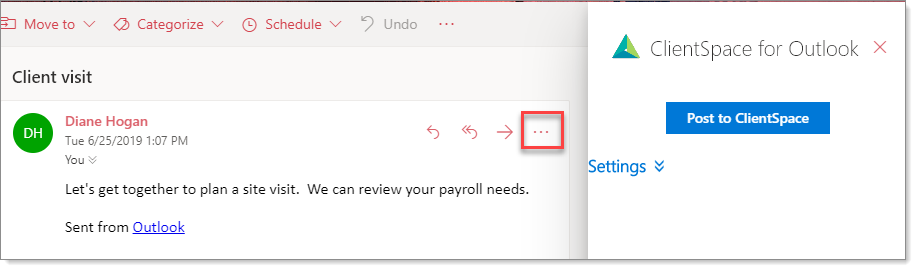
Now you are ready to post the email message to ClientSpace. - Click Post to ClientSpace.
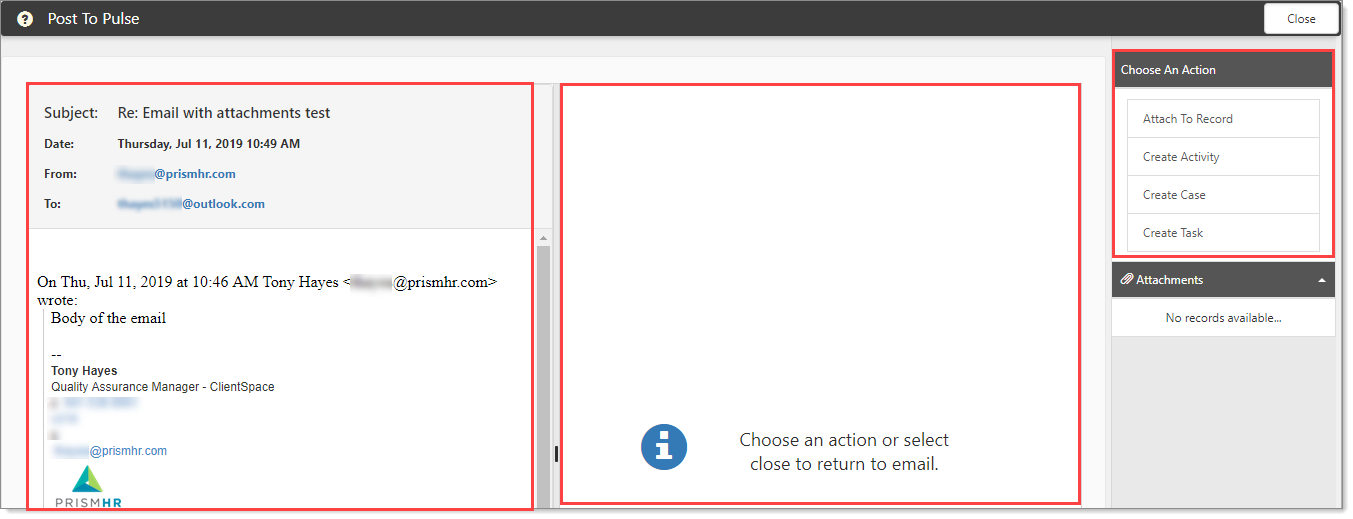
This action logs you into ClientSpace and opens the Post to Pulse page. - The Post to Pulse page has two panes and a menu with links (Choose An Action) on the right:
- The left pane shows the email message.
- The right pane is where your selected actions appear from the Choose An Action menu.
- The Choose an Action menu has links to:
- Attach To Record: attach the email to a record as an activity
- Create Activity: create an activity from the email message
- Create Case: create a case from the email message
- Create Task: create a task from the email message
What's next?
Now you are ready to save the email message as an activity, case, or task. Additionally, you can attach the email to a dataform (a record).
Attach To Record: Attach the email message to a dataform
With Attach To Record, you can attach emails to a dataform so that you do not have to create an activity first, and then perform the additional step of attaching it to a record. When you select Attach To Record, the Select Record form opens in the right pane. You can select a dataform and then select a specific record.
Scenario: Suppose that you have an email about a worker's comp claim and you want to attach the email to a specific record. The selected Workspace determines the available forms, and the form drives the available records. You want to select the form that pertains to a worker's comp claim and then select the record that is relevant to the employee in question.
To attach the message to a dataform:
- From the Post To Pulse page, under Choose An Action, select Attach To Record.
The Select Record form opens in the right pane.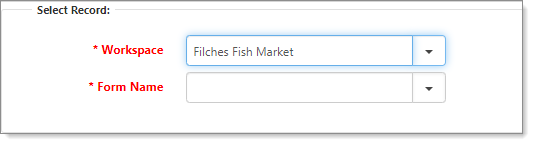
- Workspace
- If the FROM address is the same as the ClientSpace email address, it is not used to determine the Workspace. Instead, the first TO address is used to determine the Workspace.
- If the FROM address is NOT the same as the ClientSpace email address, the Workspace defaults to the Workspace of the email sender (the FROM address).
- The email address is compared to all employee email addresses (both Personal and Work email) in the system and tries to match the email. If a match is found, the Workspace associated with that employee is used. If multiple instances of the employee email (Personal and Work) exist, the most recently changed instance is used. If the From email is not recognized, then you can select a Workspace of your choice.
- In Form Name, select a dataform. When you select a dataform, the Record field becomes available. Form Name lists forms that are available to the selected Workspace.
- In Record, select a record. To see a more extensive list, click Record Search. The search list is loaded for the selected Workspace. You cannot change or remove the selected Workspace.
- To select a record from the Search list, highlight the row and click Ok.
You are returned to the Post To Pulse page with the Select Record form auto-filled (right pane). - In Choose An Action, select Attach Email.
In the right pane, the message "Email attached successfully!" appears. - From here you can click Open Record to view the record with the newly attached email.
The form that you selected in Form Name opens. - From the open form, in the Action Center, expand Activities to see the newly attached email.
- When ready, click Cancel.
You are returned to the Post to Pulse page. - When ready, click Close.
Create Activity: Create an activity to record the selected email
When you select Create Activity, Create an Activity For opens in the right pane. You can connect the activity to an organization and contact. You can only select organizations that you have access to along with their related active contacts.
To create an activity:
- From the Post To Pulse page, click Create Activity.
The Create An Activity For form opens in the right pane with three fields: Organization, Primary Contact, and Additional Contacts.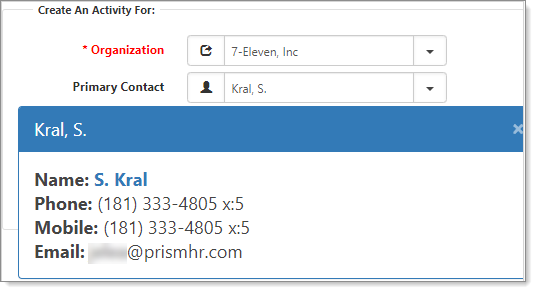
- For Organization, if the From address of the email matches a contact in the system, the From address of the email is automatically set to the Organization related to that contact. However, if the FROM address is the same as the ClientSpace email address, it is not used to determine the Organization. Instead, the first TO address is used to determine the Organization.
- If there is no set Organization, you can add an organization (in the Organzation list, select Add new item) or select one from the list.
- For Primary Contact, if the From address of the email matches a contact in the system, Primary Contact is automatically set to the matching contact. You can add a contact or select one from the list. Primary Contact is not a required field. If the FROM address is the same as the ClientSpace email address, it is not used to determine the Primary Contact. Instead, the first TO address is used to determine the Primary Contact.
- In Additional Contacts, select names from the list. You can add multiple contacts.
- To remove users, click
 (Remove).
 - When ready, in Choose An Action, click Save Activity.
In the right pane, the message "Activity created successfully!" appears. - From here you can click Open Activity to view the record with the newly attached email.
The Activity Details form opens, with text from the email message auto-filled. - To see the contacts that you added, in the Action Center, expand Contacts.
- When ready, click Cancel.
You are returned to the Post to Pulse page. - Click Close.
Create Case: Create a case to record the selected email
When you select Create Case, the Workspace Selector form opens so that you can connect the case to a Workspace.
To create a case:
- From the Post To ClientSpace page, in Choose An Action, click Create Case.
The Select Workspace form appears in the right pane. - Workspace
- If the FROM address is the same as the ClientSpace email address, it is not used to determine the Workspace. Instead, the first TO address is used to determine the Workspace.
- If the FROM address is NOT the same as the ClientSpace email address, the Workspace defaults to the Workspace of the email sender (the FROM address).
- The email address is compared to all employee email addresses (both Personal and Work email) in the system and tries to match the email. If a match is found, the Workspace associated with that employee is used. If multiple instances of the employee email (Personal and Work) exist, the most recently changed instance is used. If the From email is not recognized, then you can select a Workspace of your choice.
- In Choose An Action, click Start Case.
The Case Add form opens. Fields are populated based on your Create Case module configuration. From here you can manage the case as usual. - Complete the form. Email fields that are available for configuring the case include Date Sent, Subject, Body, To (Recipient), and From (Sender)..
- Click Save.
You are returned to the Post To Pulse page. In the right pane, the message "Case #nnnn successfully created!" appears. - From here, you can click Open Case to view the newly added case.
- on the Post To Pulse page, when ready, click Close.
Create Task: Create a task to record the selected email
When you select Create Task, the Select Workspace form opens so that you can connect the task to a Workspace.
To create a task:
- From the Post To Pulse page, in Choose An Action, click Create Task.
The Select Workspace form appears in the right pane. - Workspace
- If the FROM address is the same as the ClientSpace email address, it is not used to determine the Workspace. Instead, the first TO address is used to determine the Workspace.
- If the FROM address is NOT the same as the ClientSpace email address, the Workspace defaults to the Workspace of the email sender (the FROM address).
- The email address is compared to all employee email addresses (both Personal and Work email) in the system and tries to match the email. If a match is found, the Workspace associated with that employee is used. If multiple instances of the employee email (Personal and Work) exist, the most recently changed instance is used. If the From email is not recognized, then you can select a Workspace of your choice.
- In Choose An Action, click Start Task.
The New Task form opens. Fields are populated based on your Create Task module configuration. - Complete the form. Email fields that are available for configuring the task include Date Sent, Subject, Body, To (Recipient), and From (Sender).
- Click Save.
You are returned to the Post To Pulse page. - When ready, click Close.
For more information about creating cases or tasks from Outlook, read Configuring the Outlook Add-in Module for Create.
NOTICE: You are in the old ClientSpace Help system. Please link to the new ClientSpace Help here https://extranet.clientspace.net/helpdoc/home/ClientSpace.htm