NOTICE: You are in the old ClientSpace Help system. Please link to the new ClientSpace Help here https://extranet.clientspace.net/helpdoc/home/ClientSpace.htm
Internet Explorer Settings for ClientSpace
Because of the amount of interactivity in ClientSpace, from dialog windows to Merges, there are some basic browser settings that should be made on any machine that would like to take full advantage of ClientSpace functionality. These browser changes range from security settings to Add-ons and are comprised of the following:
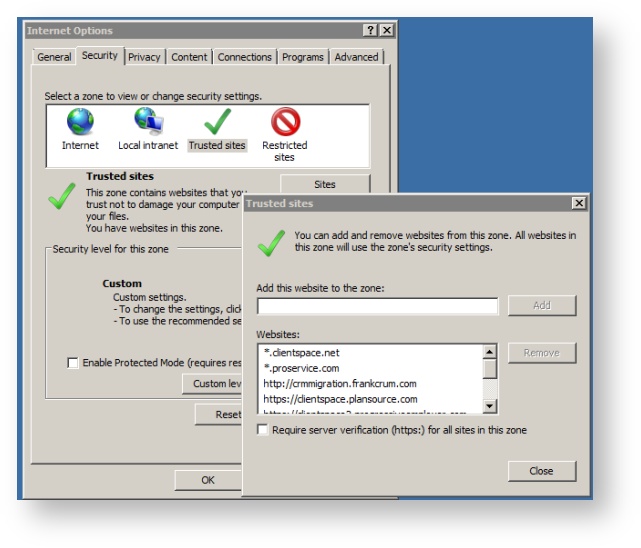
If you are unable to access the sites area, or unable to add your ClientSpace domain to the trusted sites list, please contact your local IT administrator, as these settings may be locked down in your environment.
Pop-up Blocking: The blocking of pop-ups from ClientSpace can cause unexpected behavior in the application, so the ClientSpace domain for your install should also be added to the list of Allowed sites for pop-ups in Internet explorer. To access the list go to Tools | Popup Blocker | Popup Blocker Settings. The window below will be displayed. 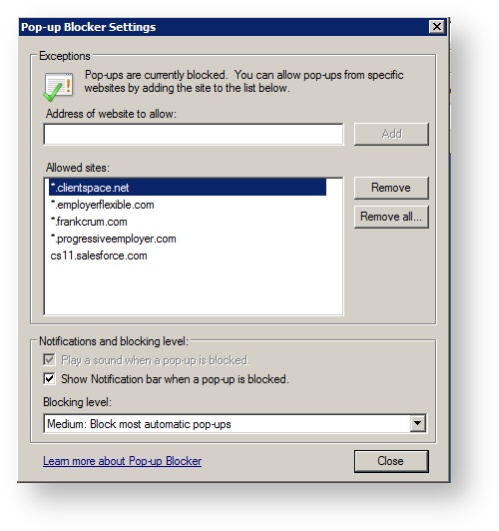
As with trusted sites, you should add the domain of your ClientSpace installation to the list of allowed sites by typing it into the 'Address of website to allow box', prefacing it with an asterisk* and clicking 'Add'.
Additional considerations for Internet Explorer 10+: With Internet Explorer 10 and up, Microsoft made some major changes to the way the browser handles javascript and other web technologies, which can cause unexpected behavior in the application. To avoid these issues you should set your browser to use compatibility mode for the ClientSpace application. Compatibility mode can be set through the following steps:
Open Internet Explorer and go to your ClientSpace login page – some users have reported that the login page does not load under I.E. 10, that is OK, we just need to get the URL from the browsers address bar:

Select the domain portion of the Url – in the above example this would be clientspace.net, your install may be different. In I.E. go to the tools menu, if you do not have an Option for Tools, right click the top of your browser and insure the 'Menu Bar' is checked, then go to Tools | Compatibility View Settings and add the domain portion of the Url that you just selected into the 'Add this website:' field (this will default in some cases) and click Add - this will set the browser to use compatibility mode for any page where the Url ends in that domain (in our example, clientspace.net).
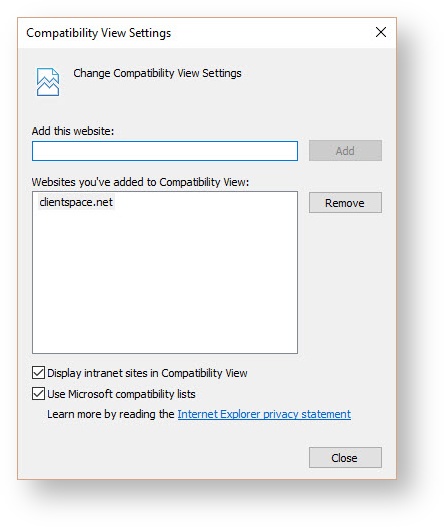
Save your settings, and you are done.
ActiveX Filtering: In a few rare cases we have seen ActiveX filtering enabled in a client's browser, which again, can cause unexpected behavior in ClientSpace. ActiveX filtering can be disabled from the tools menu in Internet Explorer, check to insure that ActiveX filtering is not checked.
Watch the tutorial on Configuring Internet Explorer for ClientSpace. ![]()
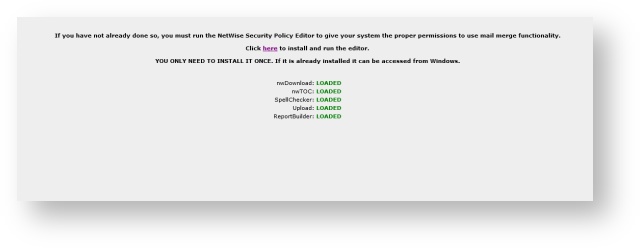
Installing ActiveX Addins for ClientSpace The ActiveX Addins can be installed from the Admin Workspace in a client's production site. In a few rare cases, the ActiveX Addin installer is not on the Admin Workspace TOC. In this situation, contact Netwise Support or your NetWise Account Manager. From the Admin Workspace TOC, click the 'ActiveX Install' link. When this is first clicked, It will say 'LOADED' next to each ActiveX add-in but they will fail to load.
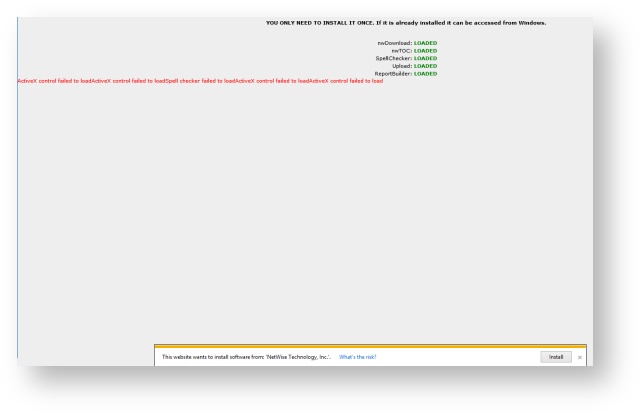
Although it shows the ActiveX Addins loaded, the install did not complete properly because the permission request at the bottom of the screen is needed to install properly. Click the 'Install' button and your browser will redirect off the page. Click on ActiveX Install again and this time the controls will not load manually. The application will ask to install before each ActiveX addin, totaling five times. Once properly installed, the controls will show as 'LOADED'.
To watch all the steps to "Configuring the Browser for ClientSpace" - Click Here ![]()
NOTICE: You are in the old ClientSpace Help system. Please link to the new ClientSpace Help here https://extranet.clientspace.net/helpdoc/home/ClientSpace.htm