NOTICE: You are in the old ClientSpace Help system. Please link to the new ClientSpace Help here https://extranet.clientspace.net/helpdoc/home/ClientSpace.htm
Configuring Dynamic Field Display
Configurable Field Display provides an administrator with vast control over the general look and feel of a dataform. This is much more than just properly grouping fields into fieldsets or tabs but includes the ability to dynamically enable or disable fields and show or hide fields or fieldsets based on the other data on that dataform. In combination with custom header links, an administrator can virtually set up any workflow or process in ClientSpace utilizing Dynamic field display. When configuring field display, it is important to keep in mind what you would like to accomplish and map out how the end result should work on your dataform.
Note – Required dataform fields hidden through configurable field display will not present their Required attribute to the system’s dataform save logic, meaning these fields will only be required if visible. This allows you to structure complex dataform logic and workflow within a dataform. This flexibility should be tempered with advance planning to ensure that appropriate data is being captured when required. In short, make sure you are not hiding a field you would like completed.
To configure and manage dynamic field display:
Go to System Admin
 > Advanced > Manage Field Display.
- It is a good idea to filter the presented list for the dataform to which you will add field display so that you can better understand the existing field display logic and determine if this will affect the changes you wish to make.
The following example shows a filter using Form Test in the Search field.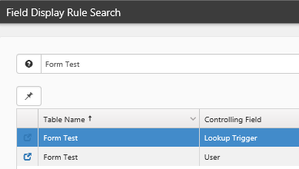
- When ready, click Add.
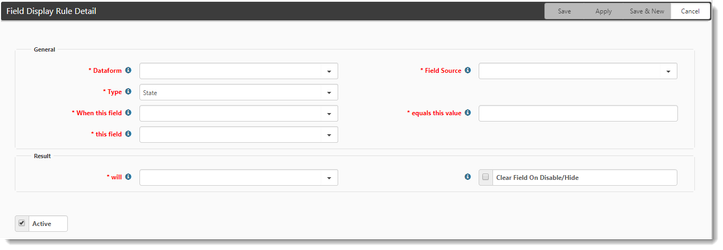
The Field Display Rule Detail form opens. This form provides a number of configuration options to customize how your field display will work. Complete the form.
 Form fields
- Dataform - (required) Select the dataform table for which you would like to configure field display - this selection will affect several other choices on this form.
- Field Source – (required) Choose a field from the dataform (This Table) as the trigger or a field from a Field Display Proc (Field Display Proc 1 or 2) that has been configured for your company by PrismHR development. A Field Display Proc is a custom SQL stored procedure that allows you to aggregate information from other dataforms in the system. This would allow you to say, disable all of the fields on a workspaces Employee and Employment forms if the Client Status on the Client Master page is ‘Terminated’.*
- Type – (required) Determines whether this will be a Field display change that affects State or Styling:
- State: Visibility / Read-Only attributes (default)
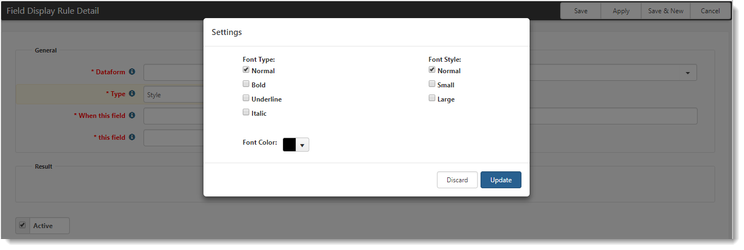
- Style: Sets CSS Styling changes to the field label based on specific triggering condition (see adjacent image). To set Style, click Settings. the Settings dialog opens.
- When this field – (required) Presents a series of fields based on your choice of Table Name and Field Source. Whatever is selected in this field will act as the trigger for your field display action.
- equals this value – (required) This is the triggering value and should be set to something appropriate for the triggering field selected to the left. For example, a checkbox selected as the triggering value should equal either True or 1 if you want to trigger your field display off the checked state. The value of a Lookup trigger field should equal the code value of either one of the lookup options, or a comma-separated list of such code values. OR statements can be built in this way using a comma-separated list of values in this field for distinct value fields such as lookups, text, or parent form fields. Say you have a lookup field to store the days of the week - you could trigger field display for weekend days by using equals this value: Saturday, Sunday (this equates to 'where value equals 'Saturday' OR 'Sunday').
Note
Hiding a fieldset hides all fields within the fieldset, masking any required field actions for those fields.
- This field - (required) This is the field (or fieldset) upon which you will perform the field display action.
- will – (required) Choose a field display action of either:
- Enable – Opens field for edits, allows changes to the field to be saved.
- Disable – Marks the field read-only and not editable.
- Hide – Hides the field from display
- Display – Shows the field on the dataform.
- The Clear Field on Disable/Hide does exactly that, it removes any information previously stored in this field when it is hidden or disabled. This is a hard delete from the system, so exercise careful planning when choosing this option.
- After you have configured all of the field display options, click Save.
Field display can be cascaded. Combine this with required field rules and it allows you to build incredibly complex workflow within a dataform. An example of this could be a form, where filling out a Pay Frequency field with a value of Weekly displays a Weekly payroll fieldset containing a required Pay Type field with values of Check or Direct Deposit. Selecting Direct Deposit displays a field for Bank Authorization, which is also required to save the form and so on.
Related articles
NOTICE: You are in the old ClientSpace Help system. Please link to the new ClientSpace Help here https://extranet.clientspace.net/helpdoc/home/ClientSpace.htm