NOTICE: You are in the old ClientSpace Help system. Please link to the new ClientSpace Help here https://extranet.clientspace.net/helpdoc/home/ClientSpace.htm
Configuring Security in Business Intelligence Reporting
The following document describes the elements involved in configuring and regulating security in both Ad Hoc reporting and Business Intelligence reports in ClientSpace.
Step-by-step guide
Configuring security for Ad Hoc/Business Intelligence reporting is a multi-step process.
For a ClientSpace user to access data from Ad Hoc / BI reports the user must have an Ad Hoc profile. These profiles, in combination with Dataform security, determine what data the user can access through the reports. This is designed to ensure that if a user does not have access to a particular piece of data through the normal user interface (UI), they will not be able to access the data through reporting. The first step is to configure Ad Hoc profiles, which secure the tables and views used as datasources by the Reports interface.
To configure security:
- Go to System Admin
 > Advanced > Ad Hoc Profiles.
The Ad Hoc Profiles list is displayed. - For an existing profile, select a profile from the list (double-click to open).
- Select the appropriate options: Allow Report Creation and/or Allow All Forms and Views.
- Click Save.
- To add a new profile, click Add.
- In the New Ad Hoc Profile, in Profile Name, enter a name.
- Select the appropriate options: Allow Report Creation and/or Allow All Forms and Views.
- Click Save.
*** Ad Hoc Profile security takes precedence over Report Security. The Ad Hoc Profile security hides a report in the list if the user does not have access to all of the tables called by the report.
Now that you have the profile configured, you must add the profile to the user in question to enforce the form security.
- Go to System Admin > Users.
The Users list is displayed. - Open the user account (double-click an entry).
The User Details form opens. - In Administrator Settings, in the Ad Hoc Profile list, select an Ad Hoc Profile for the user.
- Click Save.
The final step is to secure the individual reports. Report security in combination with the datasource security can be quite granular in its application.
- Open a report.
- On the report, click the Misc tab.
- To adjust the Share With section of the report, select a ClientSpace role containing the users in question and an appropriate Security Right.
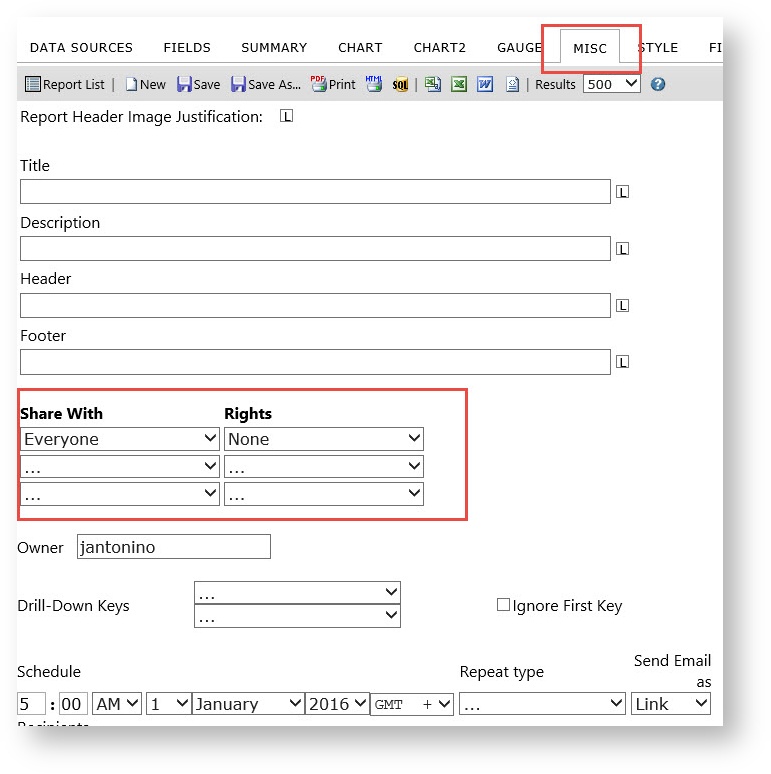
The various rights levels are:
- Full Access - Report is available to the user to view, modify, and save changes to the report. Note that the owner user (UserName property of the ReportSet) is not changed on saving, that is the original owner (creator) of the report stays the same.
- Read Only - Report is available to the user to view, add, or remove filters, and modify existing filter values. Also, the user can modify (design) the report but cannot save it. However, the user could Save As this report.
- View Only - Report is available to the user to view, but not to modify in any way or save changes to the report.
- Locked - Report is available to the user to view and modify existing filter values, but the user cannot add or remove filters or fields, or save changes to the report. Note that modifying filter operator and/or filtered column is restricted as well.
- None - Report is unavailable to (hidden from) the user.
Additional Security - Report Filtering using #CurrentUser
A common practice in Sales reporting is to use the custom wildcard of #CurrentUser on a filter for the Assigned To user of an Organization or other similar userID fields. This wildcard tells the report to only access records where the AssignedTo User ID is equal to the User ID of the currently logged in user of ClientSpace.
Related articles
NOTICE: You are in the old ClientSpace Help system. Please link to the new ClientSpace Help here https://extranet.clientspace.net/helpdoc/home/ClientSpace.htm