NOTICE: You are in the old ClientSpace Help system. Please link to the new ClientSpace Help here https://extranet.clientspace.net/helpdoc/home/ClientSpace.htm
Business Intelligence Report Filters
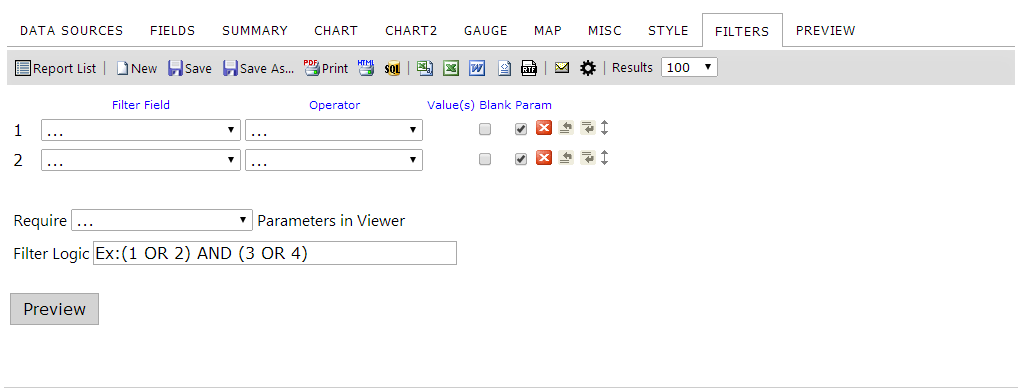
In the Filters tab, the fields of the table/view chosen in the Data Sources tab can be filtered so that only pertinent entries appear in the table.
Filter Field Dropdown Menu
The Filter Field dropdown menu is a list of the available fields in the table/view that have been selected or created in the Data Sources tab. Simply select the field you want to filter on from the dropdown menu. If you are joining tables/views, the title of the table/view that the field is from appears in parentheses next to the name of the field. The figure below demonstrates what the filter field dropdown looks like with joined tables.
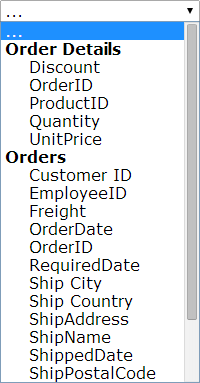
Calculated fields can sometimes also be used as report filters - These calculated fields will appear at the very bottom of the Datasource fields list.
Filter Operator Dropdown Menu and Value(s)
The Filter Operator Drop-down lets you select your operator based on the data type that has been selected in the filter. the filter fields available are only those under the Tables or Views selected in the Data Sources tab.
Operator Categories
| Type | Filter | Description |
|---|---|---|
| Comparison | Is Less Than | Displays only items whose values are less than the input values. |
| Comparison | Is Greater Than | Displays only items whose values are greater than the input values. |
| Comparison | Between | Displays only items whose values lie between the input values. |
| Comparison | Isn't Less Than | Displays only items whose values are not less than the input value. |
| Comparison | Isn't Greater Than | Displays only items whose values are not greater than the input value. |
| Comparison | Isn't Between | Displays only items whose values are between the input values. |
| Equivalence | Equals | Manual text entry of the comparison value(s) separated with commas for easy copy/paste from CSV. |
| Equivalence | Equals(List) | Manual text entry of the comparison value(s) separated by intelligently parsed delimiters. User delimiter use must be consistent. For example of consistent use: 1, 2, 3, 4 or 1-2-3-4 or 1 2 3 4 |
| Equivalence | Equals(Autocomplete) | Manual text entry of the comparison value(s) that displays a list of options as you type. Separate each value with a comma. |
| Equivalence | Equals(Select) | Allows you to select a single value from a dropdown list. |
| Equivalence | Equals(Multiple) | Allows you to select multiple values from a scrollable list. Use ctrl+click to highlight multiple values (command+click on Mac). |
| Equivalence | Equals(Popup) | Allows selection of multiple values from a popup list of checkboxes. |
| Equivalence | Equals (Tree) | Allows selection of groupings of values based on a hierarchy. NOTE: This is not a default Izenda filter. Please see this page for more information. |
| Equivalence | Doesn't Equal | Exactly the opposite of equals. |
| Equivalence | Doesn't Equal (Select) | The opposite of Equals (Select). |
| Equivalence | Doesn't Equal (Multiple) | The opposite of Equals (Multiple). |
| Equivalence | Doesn't Equal (Popup) | The opposite of Equals (Popup). |
| Equivalence | Doesn'tEqual (Tree) | The opposite of Equals (Tree). |
| Field Comparison | Is Less Than (Field) | Allows you to compare one field to another. Determines if the first field is less than the second field. |
| Field Comparison | Is Greater Than (Field) | Allows you to see if one field is greater than another field. |
| Field Comparison | Equals (Field) | Determines if one field value equals another. This is useful for joining tables on multiple fields. |
| Field Comparison | Not Equals (Field) | The opposite of Equals(Field). |
| Date/Time | Between (Calendar) | Allows you to select two dates from a calendar popup to filter on. This filter is inclusive - any dates equal to or between the specified values will be included. This can be changed to a manual text entry field by modifying the ShowBetweenDateCalendar in the AdHocSettings. |
| Date/Time | In Time Period | Allows you to select from a list of time periods to filter on. See more about Adding new time periods. |
| Date/Time | Less Than Days Old | Allows a single numeric entry to represent the days and uses that as a filter. |
| Date/Time | Greater Than Days Old | The opposite of Less Than Days Old |
| Date/Time | Equals Days Old | Filters on records that are only as many days old as you specify. |
| String | Like | Determines if the value of the field contains the given text. |
| String | Begins With | Determines if the value of the field begins with the given text. |
| String | Ends With | Determines if the value of the field ends with the given text. |
| String | Isn't Like | The opposite of Like. |
| Boolean | True | Determines if the value in the field is "true". |
| Boolean | False | Determines if the value in the field is "false". Values other than the number 1 and the text "(T|t)rue" will be interpreted as false. |
| Available for All | ... | Selected when no filter is used. |
| Available for All | Blank | Is the field blank? |
| Available for All | Isn't Blank | Is the field not blank? |
| Available for All | Use Previous OR | See this page for more information about this option. Allows you to string together a number of fields in an OR condition as long as all fields utilize the same type of data values, such as Yes/No lookups or date fields. |
Blank and Param Checkboxes

The "Blank" and "Param" checkboxes (see image above) allow you to control the filtering behavior in the report viewer. They do not affect the “Preview” tab of the report designer.
Blank Checkbox: To use this, first set a “Filter Field” and then set an “Operator”. A value can be entered, but it is not required. If “Blank” is checked, the filter will return data that matches the “Value(s)” dropdown/textbox and also data that has a null value in that field.
In the example above, if “Blank” is checked and then viewed in the report viewer, then the user would see all of the data where the “ShipCity” begins with “s”, or are null.
Param Checkbox: To use this, first set a “Filter Field”, set an “Operator”, and then set “Value(s)”, as in the previous example. This will display the filtered report in the report viewer and allow the user to change the filter value. If it is not checked, then the filter will not be visible to the end-user and the end-user will not be able to change the filter.
In the example above, a user will be able to change the “s” to a “t” and update the report if desired.
Other Buttons on the Filters Tab
The  ,
,  ,
,  , and
, and  function buttons of the Filters tab are shown below.
| Icon | Control Name | Description |
|---|---|---|
| Delete Button | Click this button to delete the row the button is on. |
| Insert Row Above Button | Click this button to insert a row above the row the button is on. |
| Insert Row Below Button | Click this button to insert a row below the row the button is on. |
| Move | Allows users to move a row up or down in the list. You must click and drag until you see the space between rows is highlighted and release the mouse button to drop it. |
Other Filter Features
| Feature | Description |
|---|---|
| Show Filters in Report Description | Adds the filters being used to the Description field of the report when the report is viewed in the Report Viewer or is exported |
| Require [blank] Parameters in Viewer | Sets the number of filter parameters the user must set when accessing this report in the Report Viewer. |
| Filter Logic (Conditional Filtering) | Ex: (1 OR 2) AND (3 OR 4). See more about Advanced Filter Logic (see below) |
Filter Logic (Conditional Filtering)
Izenda Reports allows you to have an arbitrary number of filters on a new report. These filters can even be applied with custom logic that you define. This is done with the advanced logic filter.
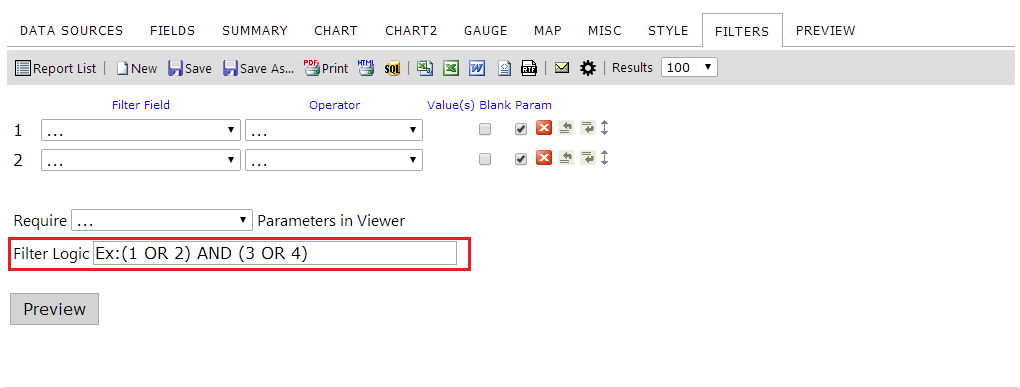
The text box on the Filters tab labeled "Filter Logic" is where you configure this logic. By default, there is an example filter already populated into the box to guide users in the format they should use. This filter logic works much like the Condition Expressions used in ClientSpace for custom link display conditions.
Changing the contents of this box will cause Izenda to attempt to apply this logic to the filters on the report when "Preview" is clicked or when the Report Viewer is accessed for this report. Using the example, "(1 OR 2) AND (3 OR 4)", results will be filtered conditionally based on meeting either Filter 1 or Filter 2 in addition to meeting either Filter 3 or Filter 4. You can construct simple to extremely complex logic using this control. If you have a mere two filters, a simple "1 OR 2" will force your results to meet either the first or the second filter condition. Alternatively, you can nest parenthesis and combine logical operators to form sophisticated advanced filters.
It is important to understand that filter logic is applied hierarchically, left to right - so in the example "(1 OR 2) AND (3 OR 4)" The dataset returned will be filtered by (1 OR 2) before assessing "AND (3 OR 4)" condition - this means that any records removed by filters 1 or 2 are not available to meet the second part of the condition "AND (3 OR 4)"
It is also important to understand that when you update filter logic, it updates filter values but does not trigger the cascading filter check - cascading only kicks in on filter value selection or filter refresh.
Since the filter logic 'update' does not trigger the cascading filter check this could leave some filter values removed which do not need to be removed. For example, if we remove some criteria from a lower filter which would cause a prior filter to remove that value from the filter list, then when the lower filter value is removed while logic is changed it might prevent the upper filter from refreshing properly, etc.
A best practice is to add all required filters to a report before adding/changing the filter logic.
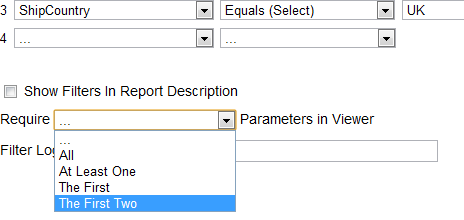
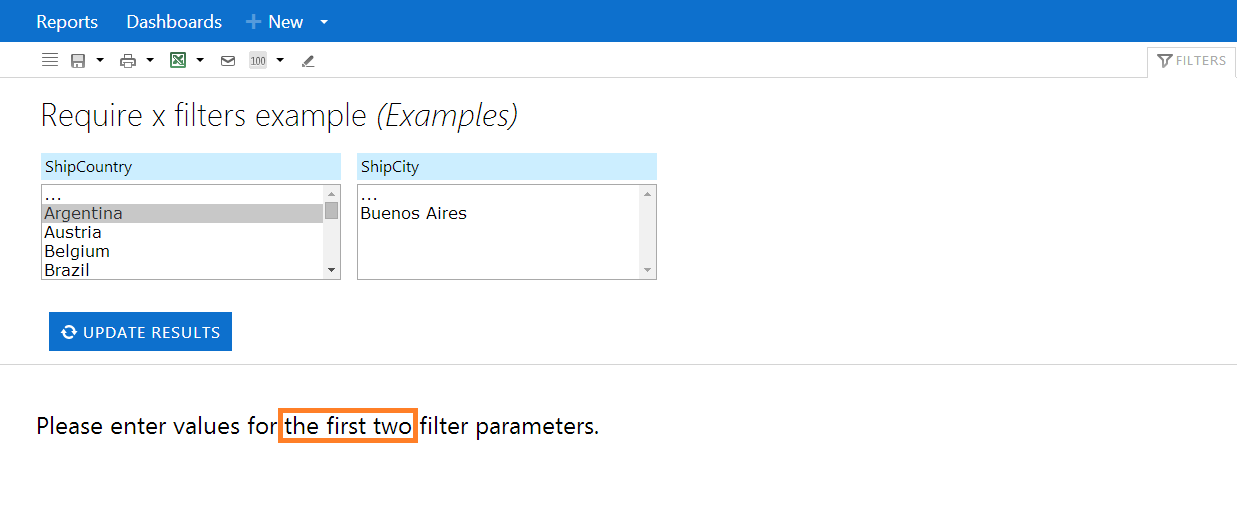
Require [blank] Parameters in Viewer
The example below requires the user to select at least two parameters before the report will run in the Report Viewer.
And here is what the user will see when attempting to access the report.
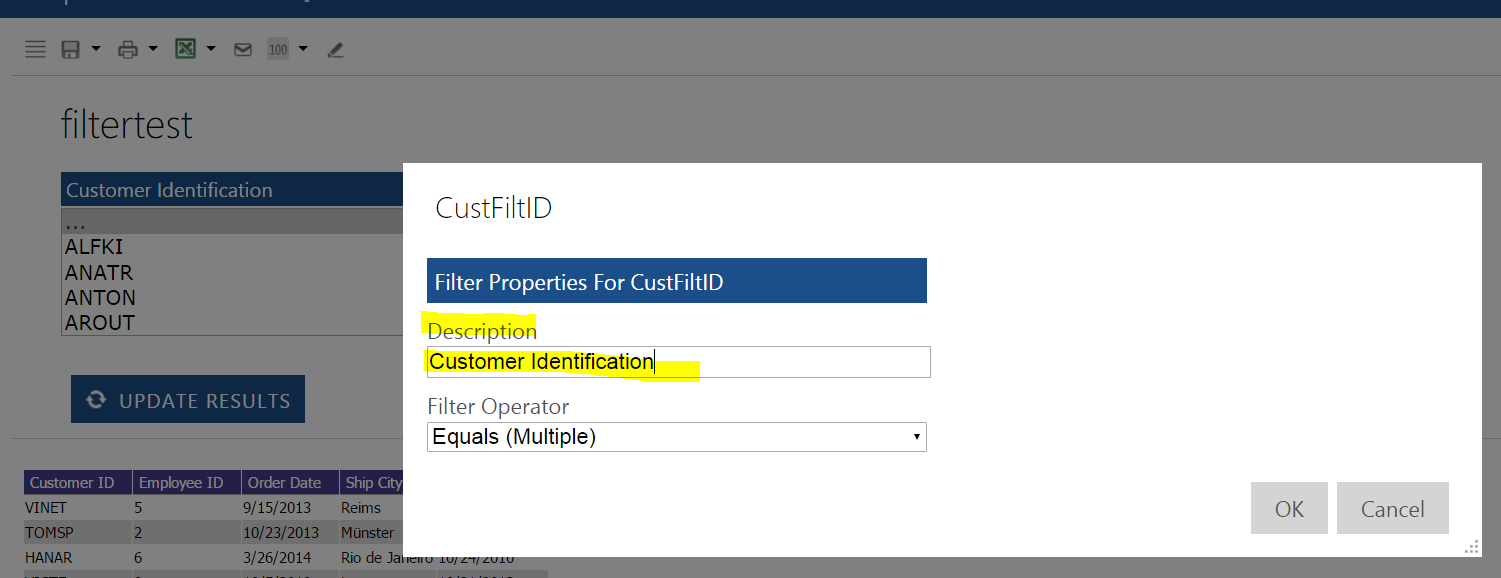
Alias Filter Field Names
The filter field name can be aliased using the Description field. This can be accessed in the Report designer from the filter tab or from the viewer by clicking the gear icon in the filter.
Here the Description can be entered in the Report Designer's Filter Tab.

And here is the description field in the Report Viewer by clicking the gear icon on the filter.
Dashboard reports and Filters
It is important to understand that when constructing a dashboard with filtered data, the included reports which you have added to the dashboards tiles must either run independent of passed filters (such as a report using the #CurrentUser flag) or must all share the filter parameters that are passed in from the dashboard which calls them. For more information regarding BI dashboards read Business Intelligence Dashboards.
NOTICE: You are in the old ClientSpace Help system. Please link to the new ClientSpace Help here https://extranet.clientspace.net/helpdoc/home/ClientSpace.htm