NOTICE: You are in the old ClientSpace Help system. Please link to the new ClientSpace Help here https://extranet.clientspace.net/helpdoc/home/ClientSpace.htm
Managing Data Imports
The ability to import data into the application provides a powerful toolset to connect your Pulse data with external systems, but it can be tricky to manage. This topic provides an overview of the functionality for managing system imports. Having the ability to connect imported data to existing data in the system is useful, but requires an understanding of your data and how the underlying tables relate. If you haven't already, check out the glossary and read about foreign key relationships as well as relational databases.
To perform data imports, you need:
- To be a Global Admin
- Or, be given the SYS_ImportManager security entity with the Admin permission. See Configuring import management for non-Global Admins.
Data relationships
When configuring imports, you must understand the data relationships within your installation. Each record to be imported must have a unique identifier (ImportID) as well as at least one column containing a method for relating that imported record to another record in the system, be it an Organization, Workspace, Contact or a combination of these. An incorrectly configured import can corrupt or overwrite existing data, which can then be difficult or even impossible to fix or replace.
If you have not spent the time to thoroughly map this out or have questions about how the imported records will tie to existing data STOP, create a case for one of our staff consultants, and request either help in configuring your import or training about the import process. It is much easier (and frankly less expensive) to request help in getting an import set up right the first time than it is to incorrectly import records, and then request help cleaning up the associated fallout.
To manage data imports:
- Go to System Admin
 > Imports > Manage Import.
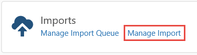
The Manage Import list is displayed.
If you have never imported a file, this will open without any files in the list. When there are no files in the list, your options are limited to Adding a file. - Click Add.
The Upload File dialog opens.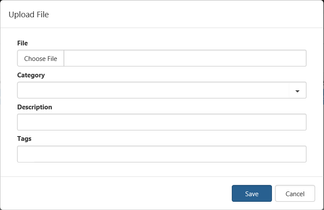
- Browse to the file you would like to upload. Choose File allows you to browse your local and network drives to select a file.
- From this screen, you also have the ability to select a Category for the file, include a brief Description of the file and add any Tags that may relate to the file.
- After you have completed the necessary fields click Save.
- If you have selected a file whose filename does not match one of the configured import mappings in your installation, you will receive the following error:

- If you have received this error and are not sure why, STOP and create a case for help from one of our staff consultants.

- When a file has been properly added, you will see an action button with the option to Validate File. Validation compares the file structure to a pre-existing import configuration to ensure that the file has all the required columns. This will also perform some high level validation of the data contained within the columns to ensure that the data types match to the field into which the data will be imported. Successful validation unlocks the ability to import the file, changing the Validate File button to Run Import.

- With the record in Validate Complete status, click Run Import to begin the import process. The action button will reflect that the import process is Running.

When complete, the action will display Completed.
- Finally, you can check the success of your import. Open the record and use the action item links on the right:
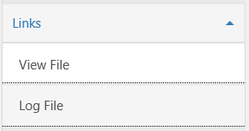
- From here you can either review the Log File for import errors, or use View File to open the imported file itself.
It is a recommended best practice on new imports to review the data that you just imported for completeness by navigating to the dataform in the workspace and checking your work. Check that you have the expected number of records and that the appropriate data appears in each of the imported fields.
Related articles
NOTICE: You are in the old ClientSpace Help system. Please link to the new ClientSpace Help here https://extranet.clientspace.net/helpdoc/home/ClientSpace.htm