NOTICE: You are in the old ClientSpace Help system. Please link to the new ClientSpace Help here https://extranet.clientspace.net/helpdoc/home/ClientSpace.htm
Configuring Slack Integration
Pre-requisites required
Slack integration requires that you are already using Slack in your business and that you have a Slack Administrator. Configuration of Slack Slash commands by your Slack Administrator is required for this integration.
For Pulse Clients, after the Slack Slash Command has been created, contact your professional services representative for help configuring the Slack API.
SLACK CONFIGURATION
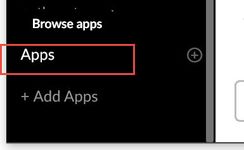
- A Slack administrator will have the ability within Slack to Browse and Add new apps to the Slack install. This normally appears at the bottom of the Slack user list.

- Install the Slash Commands App to the Slack installation. If the Slash Commands App is already installed, click View to add a new configuration.
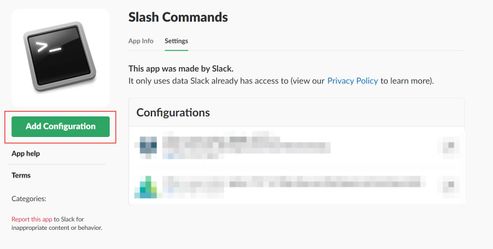
- Click Add Configuration.
- Next, configure the Integration Settings for this install.
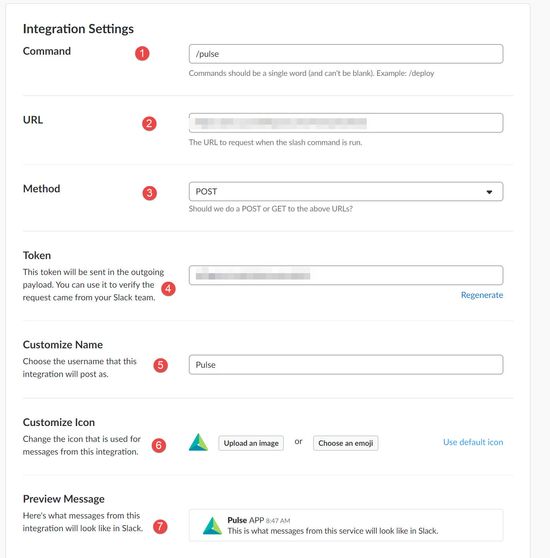
- Command: This is the precursor command you will use in Slack to begin requesting data from ClientSpace - in our example we are using /pulse
- URL: This is the install URL of your ClientSpace installation with /next/peo/slack appended to the end - ie: https://yourinstall.clientspace.net/next/peo/slack.
- Method: This is the where you select which request-response method will be used when connecting the third party application - always select "POST" as we will be sending information to the Slack application.
- Token: Simply adding the configuration will cause the Slack system to generate a token - this token identifies the Slack application for third party integrations and will be used when configuring the ClientSpace application. It is recommended you copy this to notepad as you will use this later.
- Customize Name: This is the name that will identify the slash command responses - the Slack username that your ClientSpace data will come from.
- Customize Icon: The icon that will appear in Slack next to the response.
- Preview Message: This field will give you an advance preview of what you can expect the slack interaction to look like.
- All other configurations should be left at their defaults.
- Click Save to save your Slash Command Config.
APPLICATION CONFIGURATION
Application configuration consists of two parts:
- Third Party Application (TPA) configuration
- user configuration.
To begin:
- Go to System Admin
 > Advanced > Third Party Applications.
 - Click Add.
- The TPA dialog opens. Complete two fields:
- Name - give this TPA configuration a descriptive name such as "Slack"
- Private Token - This is where you will enter the Token that was generated during the Slash Command configuration in Slack. This is what identifies the Slack application as a valid Third Party application.

- Once you have completed these two fields, click Apply to save the TPA configuration.
You will then need to add users to your TPA configuration
To add users:
- In the Action Center, click Users.
The Third Party Application Users list is displayed. - Click Add.
The Add Third Party User dialog box opens. This is where you add user records for each user who will be connecting through Slack.- System User: Select the ClientSpace user.
- Third Party LoginID: Type the user's Slack ID.
- Click Save.
The newly added user is displayed in the Third Party Application Users list.
USING THE INTEGRATION
To use the Slack integration - simply type one of the available Slash commands after typing the prefix command you assigned in Step one of the Slack integration settings. In our example we are using /pulse
The following is a list of available commands that may be used in Slack to retrieve ClientSpace information:
Sharing data in a Group Channel
When returning data to a group channel using the commands below, the returned information will be visible only to you, unless you explicitly use the -share command. If you include -share in your request the returned data will be visible to anyone in the Slack channel. Example: /pulse mycases -share
case
Returns information about a Case by Case Number.
example /pulse case 1234
escalated
Returns escalated cases assigned to you, ordered by Escalation Date Descending (newest first)
examples:
/pulse escalated
/pulse escalated -share
help
Lists all of the available commands
example: /pulse help
mycases
Returns the most recent 10 cases assigned to you, ordered by Date Created descending (newest first)
examples:
/pulse mycases
/pulse mycases -share
mytasks
Returns the most recent 10 tasks assigned to you, ordered by Start Date descending (newest first)
examples:
/pulse mytasks
/pulse mytasks -share
task
Returns information about a specific Task by TaskID
example: /pulse task 1234
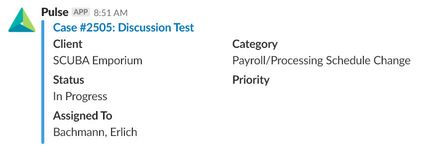
Using slack requests will return a slack post containing pertinent information about your request including a clickable link which will open the case/task in a new browser:
NOTICE: You are in the old ClientSpace Help system. Please link to the new ClientSpace Help here https://extranet.clientspace.net/helpdoc/home/ClientSpace.htm