Versions Compared

Key

  • This line was added.
  • This line was removed.
  • Formatting was changed.


Info
iconfalse
titleSummary

When designing ClientSpace NEXT we began with several key goals in mind. The interface needed to be functional, but elegant. The application needed to be cross-browser compatible and support multitasking without getting confusing and it needed to do all this without sacrificing functionality or requiring a daunting conversion process. One of the steps to accomplish these goals was the creation of the navigation panes on the left and right of the main work area, allowing you to more easily multitask. Additionally, this enhanced standardizes the toolset across the application so that all areas within the application are functionally the same. The following document provides an overview of the Work Items (left) and Action Items (right) navigation panes in ClientSpace NEXT

Anchor
UM
UM

Panel
titleBGColorSilver
titleUser Modules

User modules are the selectable modules that can be configured by each user, allowing them to individually customize ClientSpace and putting the tools they need at their fingertips. When the width of the user modules exceeds the amount of available space, any leftover modules will overflow and be available from the View menu to the right of the module buttons.

To add modules to your user profile:

Expand
titleAdding User Modules...

Insert excerpt
Adding Modules To Your Profile
nopaneltrue


...

Excerpt


Panel
titleBGColorSilver
titleWork Center (Left Nav)


The Work Center icons are in the upper left corner and represent the most commonly used work actions that need to be referenced across workspaces.

Home returns you to your default home page.

Notifications Inbox jumps you to an inbox where you can review and manage all of your system notifications. To find out more read Managing Notifications in ClientSpace.

Calendar: Click here to access and manage your system calendar events.

Help Center: This link provides access to our help center where you can browse a collection of focused articles, or search our Knowledge Base. For more information, watch our Help Center Overview video.

The left navigation center or Work Center area provides the key to multitasking in NEXT, allowing for the hierarchical display of multiple open Workspaces and Work Items at any given time. Work items are organized as separate levels, where the topmost level Sets allow multiple thread and sub-thread items to be opened below it. Thread items are indented below set items, and sub-thread items are further indented below threads.

  • Examples of Sets would be Workspace Landing pages and Dashboards. These topmost levels are represented by the brown bars pictured at left for Task Manager, Cases, and the Workspace Landing page.

Threads below these items would be the individual cases or tasks opened from their respective Set. Threads display a count of the associated open sub-thread items.

  • An example of Sub-threads would be a task opened from one of the cases, or a time tracking item opened from a task.

At the bottom of each Set is a caret symbol (^) that allows the entire set to be collapsed up, conserving space.

On the right of each Set, active thread, and active sub-thread item is an X that closes that item and any associated items below it.

To see the Work Center in action, watch our Work Center Overview video.


...

Excerpt


Panel
bgColorwhite
titleBGColorSilver
titleAction Center

The Action Center is located in the upper right.

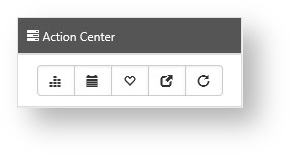
The workspace action center provides a series of common actions that can be performed from within a workspace. These actions are represented by icons and are as follows:

Org Action

The org action acts as a quick jump to the Organization associated with the Workspace you are on.

Calendar Action

The calendar action acts to open a ClientSpace calendar, pre-filtered for the workspace you are on.

Favorite Action

The favorite action adds this workspace to your favorites list when clicked - this is the same as checking the "Favorite" checkbox from the homepage or Workspaces dashboard. Once selected as a favorite the heart indicator will turn red.

Jump Action

The jump action works just like the workspace quick jump in our classic application, allowing allows you to quickly skip from one client workspace to another. Unlike our classic app, the The jump action will open this new client as another item in your work items navigation, making multi-tasking easy.

Refresh Action

Refreshes the current workspace landing page data.

For more information about Workspaces and the Landing page that provides access to workspace level items read the article: The Workspace Landing Page


...

Excerpt


Panel
titleAbout ClientSpace Lists

From the case search dashboard to task management, lists in ClientSpace all work in a similar fashion. This is by design so if you understand one list you understand them all. The following Client Service Case dashboard example gives you everything you need to know to be a ClientSpace list expert.


  1. Name - To keep the look and feel consistent, our lists all look kind of the same - the name in the upper left indicates the record type.
  2. Close - Done working with these records?  Click here to close the window and remove this from your Work Items list.
  3. Quick Search - Everyone has their preferred way of searching, but some key areas are searched so often that we made them part of the default keyword search. Click quick search  to get a list of these fields and some search hints.
  4. More Search - If quick search does not return the results you need, you can add additional search parameters under the More Search area.  
  5. Reset - Some lists such as the Client Service Case dashboard (pictured above) will open with a default set of search parameters. If you have added a number of additional filters and want to return to the default filtering, click Reset.
  6. Clear - Are you looking for something and the default filters are causing it to not be displayed?  Click Clear to clear all of the currently applied filters and run an unfiltered search - WARNING! - For installations with large numbers of records unfiltered searches can sometimes too many records and cause poor performance.
  7. Filter Chiclets - The current set of filters applied to the records list is displayed in a series of chiclets found below the search bar. Some filters can be removed as indicated by an X on the left side.
  8. Save this search - Saved searches allow you to save filter and list configurations, including more searches, quick searches, and column configurations. Save a search using  (Save This Search). To restore the list to the system default, click   (Saved Search Options) and select Restore System Default
  9. Jump to record -  (Jump) allows you to navigate directly to the selected record, essentially the same as clicking edit. This is useful when accessing ClientSpace from a mobile device.
  10. Sort - Click the column header () of a list to sort the records by that column. The arrow indicates the direction of the sort, ascending or descending.
  11. Expand List / Column management - The inverted carat () allows you to access a list of columns that may be added or subtracted to customize your list view, displaying only the columns you want. This customization is lost when you close the list.
  12. Add - Opens the Add dialog to create a new record.
  13. Edit - Edit the selected record (highlighted in blue). If no record is selected, you will get an error message indicating you must select a record to continue.
  14. Paging - Did you pull back a lot of records? Need to see the ones that are not currently displayed in the list? Use paging to move to more records in the set.
  15. Record Count - Displays the total number of records that match your current filter set.


...